
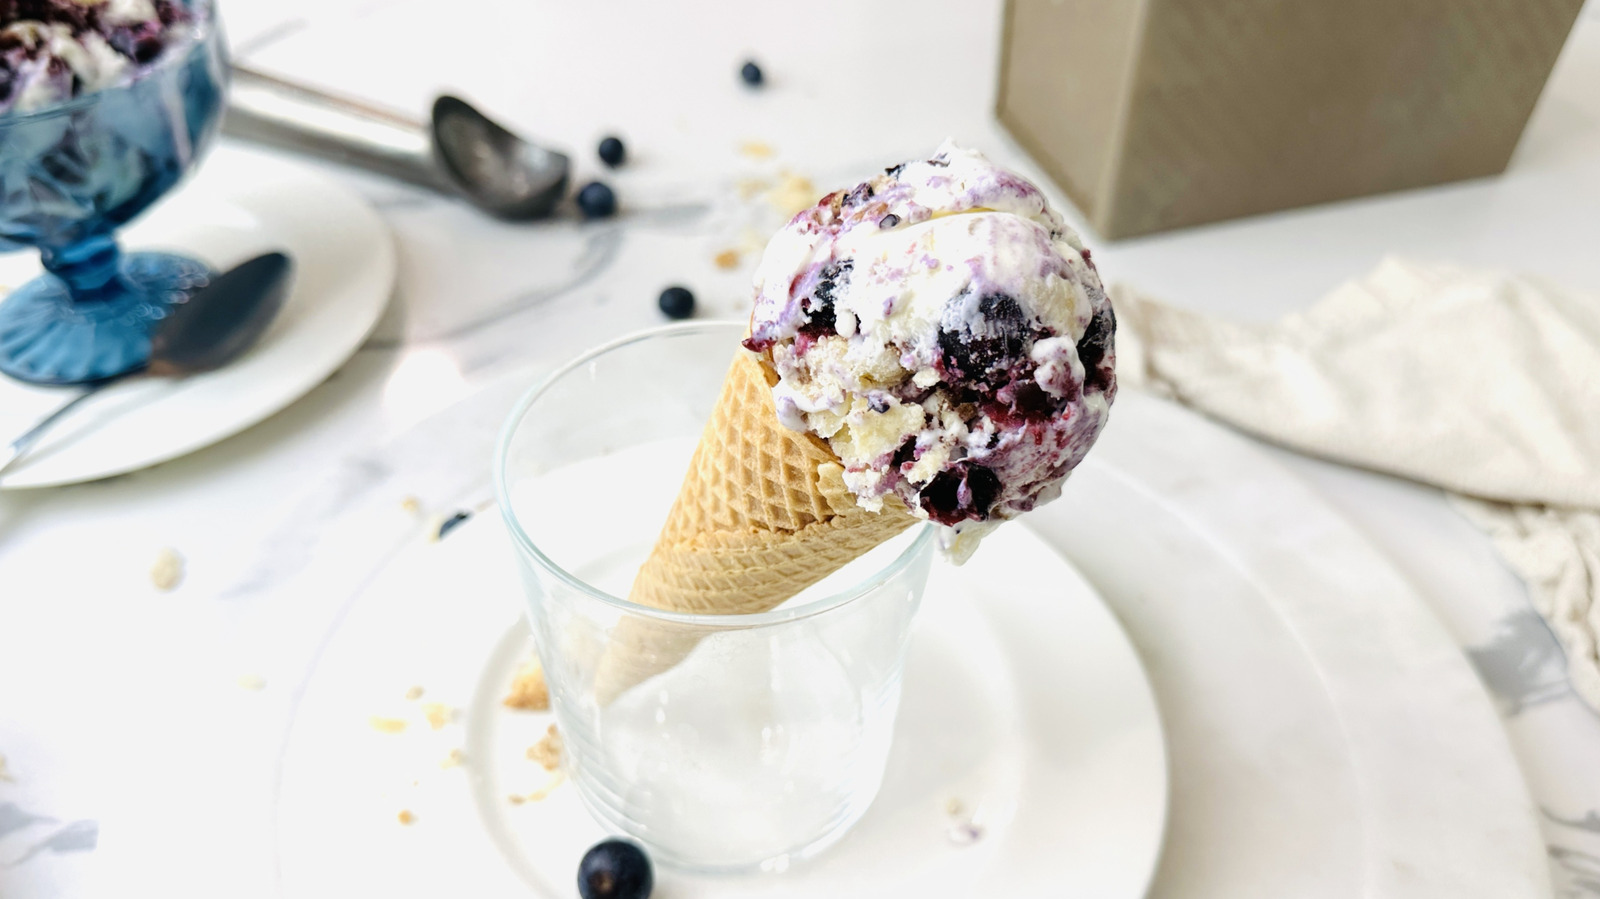
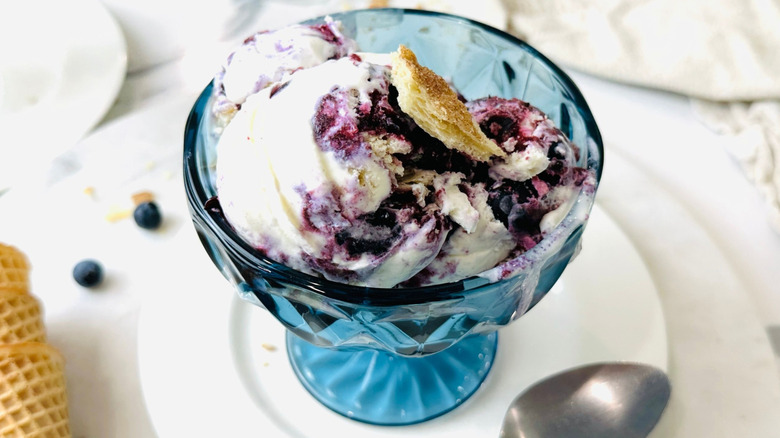
不可否認,多數甜點自製時比在雜貨店購買更美味。大多數情況下,自己動手就能做出既美味又與商店產品相媲美的甜點,例如曲奇、布朗尼或蛋糕。唯一的一個重大例外,卻是無法忽視的:冰淇淋。這道深受喜愛的冷凍奶油甜點,要是在家沒有專用的攪拌機或其他能攪動冰淇淋的裝置,其實並不容易自製。所幸,透過不需攪拌機的冰淇淋配方——例如這個由開發者 Katie Rosenhouse 推出的「無攪拌藍莓派冰淇淋」——你在家就能輕鬆做出這款冷凍明星。
在家自製冰淇淋的一大優點是你可以自訂口味,意味著你可以做出既美味又獨特的版本,像是這個藍莓派版本。「這款冰淇淋做起來非常有趣,藍莓派餡料的風味與口感都能清晰展現出來,」Rosenhouse 分享。不僅藍莓派餡料鮮豔、生機勃勃且味道平衡,還有「肉桂糖派皮在柔滑的香草冰淇淋基底中增添層次感,讓整體味道更上一層」。這道食譜確實需要一點耐心與立式攪拌機,但最後得到的冰淇淋會比你在商店買的一桶更美味。
Gather the ingredients for no-churn blueberry pie ice cream
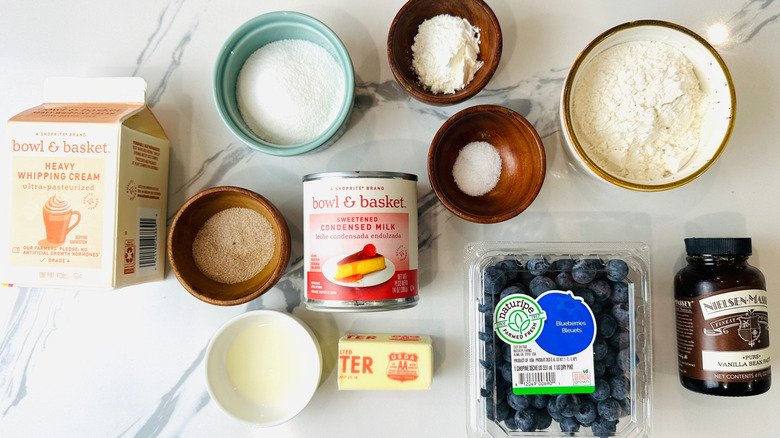
任何美味的派都以酥皮為起點,藍莓派冰淇淋也不例外。為了製作派皮(最終會碎成碎片混入、或鋪在冰淇淋表面的層次感),你需要中筋麵粉、白砂糖、鹽,以及冷藏的無鹽奶油。接下來是藍莓派餡料,所需的是新鮮或冷凍的藍莓、白砂糖、玉米澱粉與檸檬汁。剩下的就是冰淇淋基底,需要的是鮮奶油、煉奶、香草豆莢膏或香草精,以及鹽。
Step 1: Preheat the oven
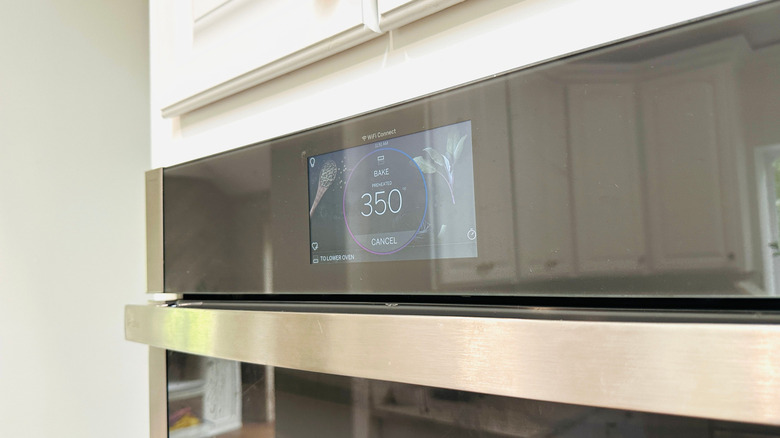
將烤箱預熱至華氏 350°F(攝氏約 177°C)。
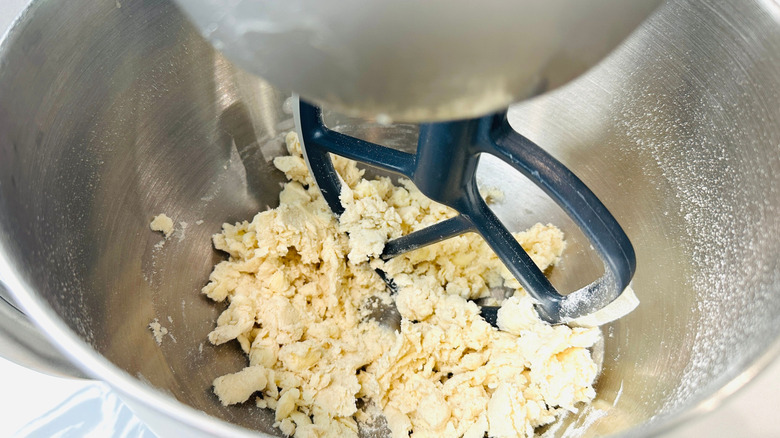
Step 2: Begin the pie crust
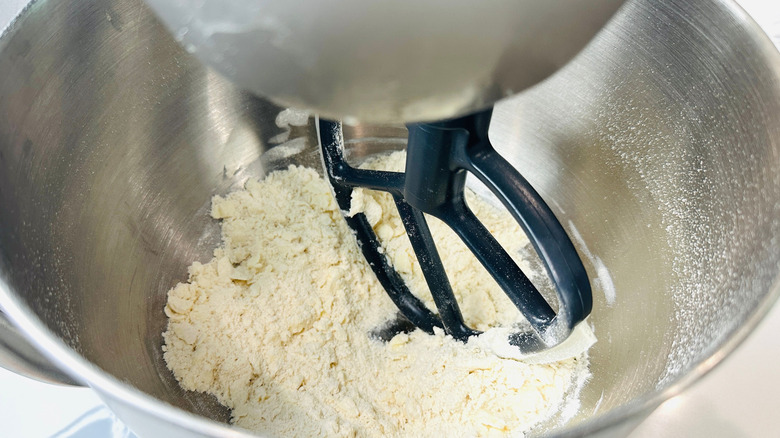
在配有刮板的立式攪拌機中,打發麵粉、糖、鹽以及切丁的奶油,直到奶油的顆粒看起來像豌豆大小。
Step 3: Add water to form dough
加入 2 大匙冷水,輕輕混合直到麵團結合但仍略顆粒狀。如有需要再加入少量水。
Step 4: Lightly knead to combine the dough
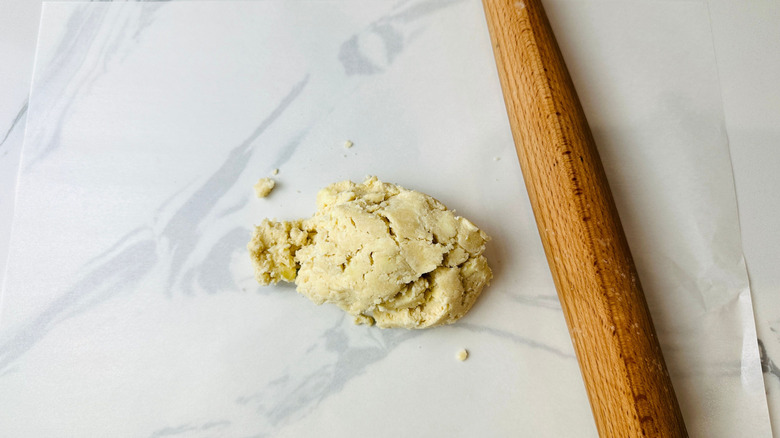
把麵團移到一張羊皮紙上,輕輕揉合即可。
Step 5: Roll out the dough
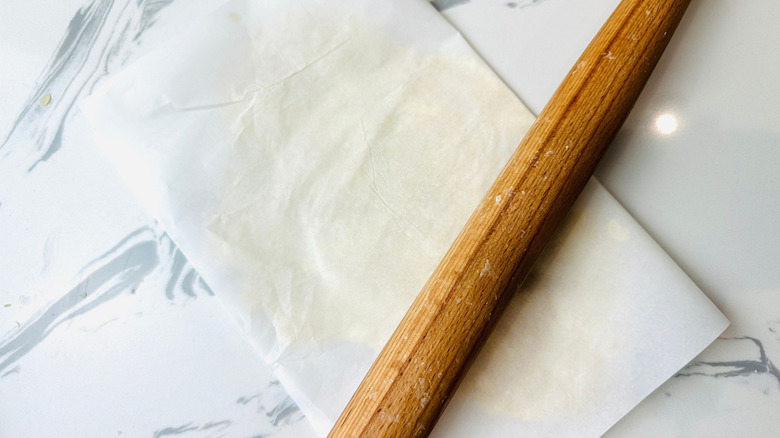
把羊皮紙覆蓋麵團,將其擀成 1/8 到 1/4 英吋厚度。
Step 6: Optionally sprinkle dough with cinnamon sugar
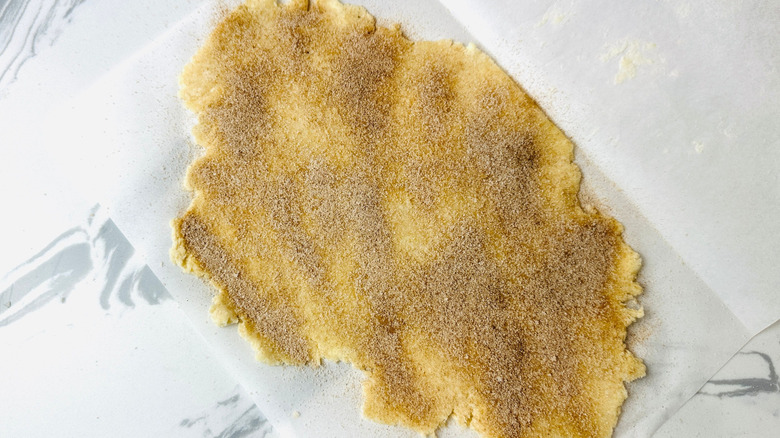
如有需要,均勻地在麵皮上灑上肉桂糖。
Step 7: Place the dough on a baking sheet
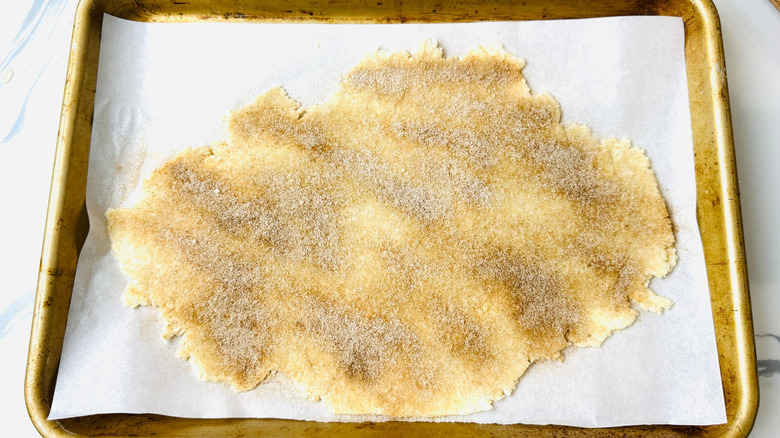
將麵團移到烤盤上。
Step 8: Bake the crust
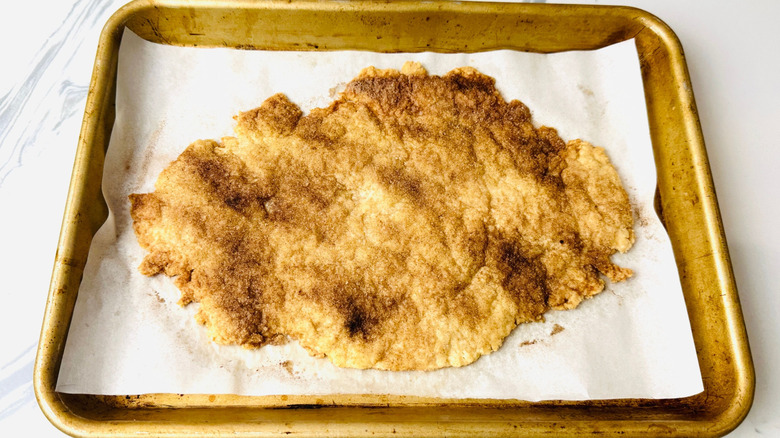
把麵皮烤 16-18 分鐘,直到呈金黃色且鬆脆,然後放在一旁完全冷卻。
Step 9: Begin the blueberry pie filling
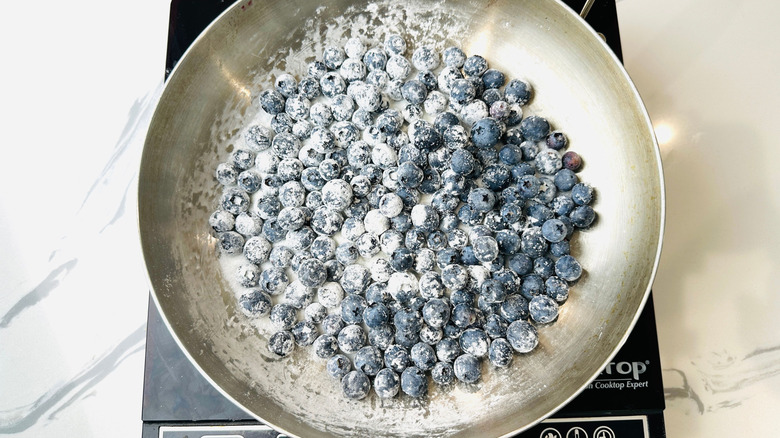
為藍莓派餡做準備,在一個大平底鍋中,將藍莓、糖與玉米澱粉混合攪拌。
Step 10: Add water and simmer the blueberries
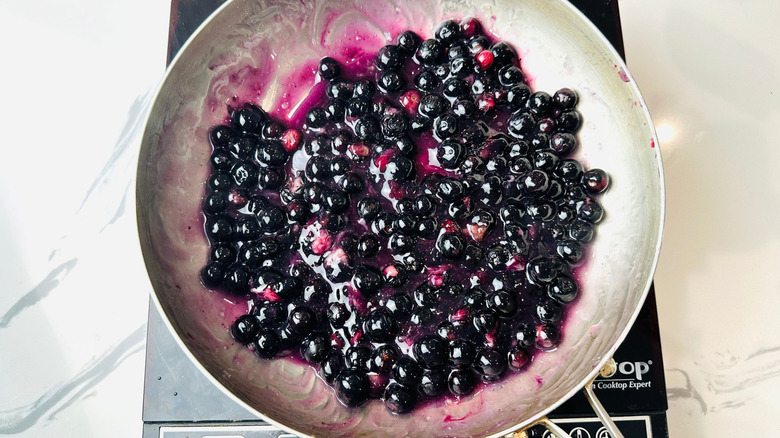
加入 1/2 杯水,低火慢煮,常常攪拌,直到醬汁變稠且藍莓釋出部分果汁。
Step 11: Stir lemon juice into the blueberries
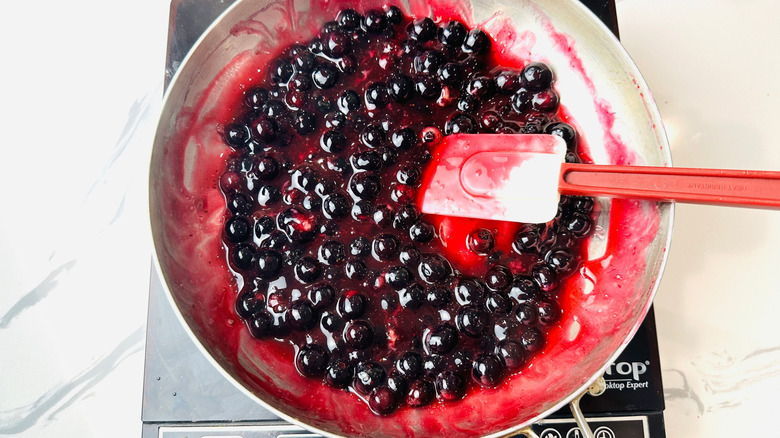
從熱源中移開,拌入檸檬汁。
Step 12: Let the filling cool
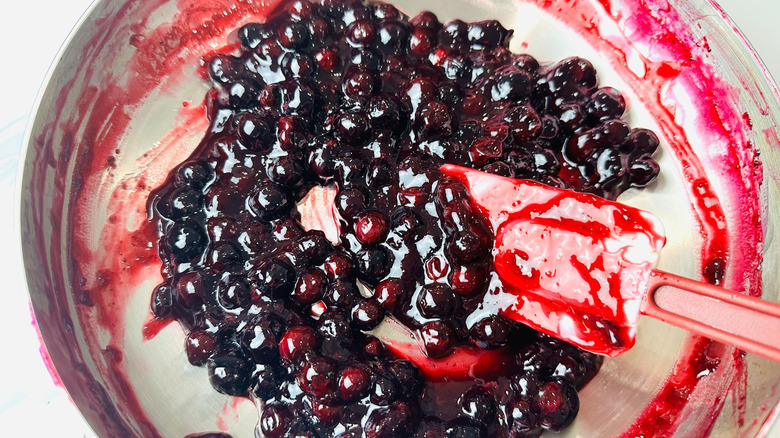
放置冷卻,或冷藏至完全冷卻。
Step 13: Whip the heavy cream for the ice cream base
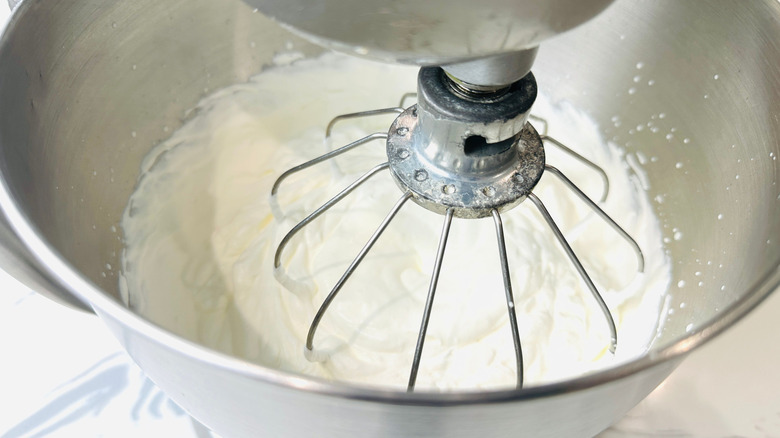
為冰淇淋底料,在裝有攪拌棒的立式攪拌機碗中,將重奶油打至軟尖發泡。
Step 14: Add condensed milk, vanilla, and salt
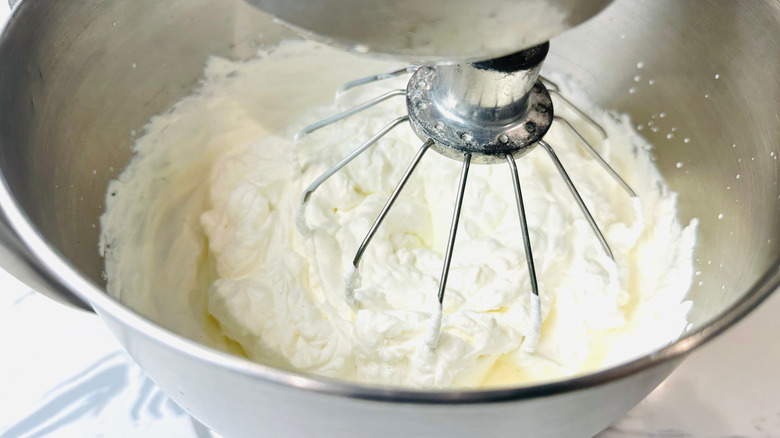
加入煉乳、香草和鹽,並輕輕攪打至接近中等硬度的尖峰狀態。
Step 15: Scrape down the bowl
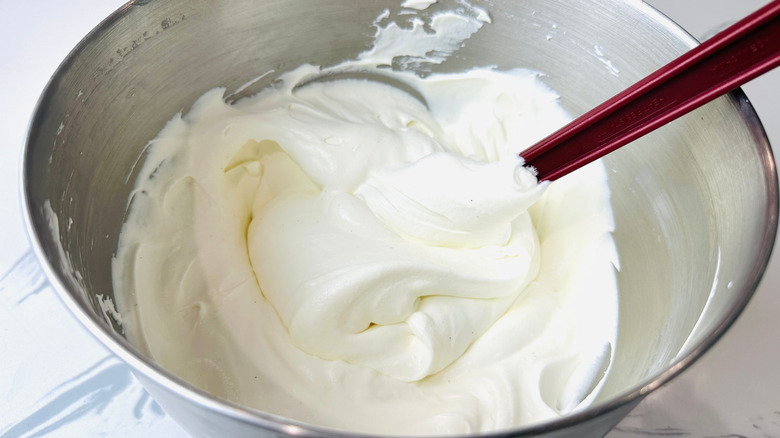
用刮刀將碗壁與底部的材料拌勻,確保所有材料均勻混合。
Step 16: Break up the pie crust
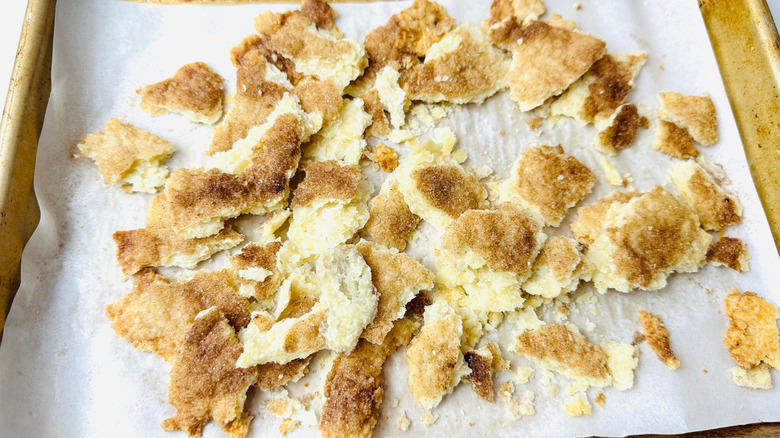
把派皮切成粗碎塊。
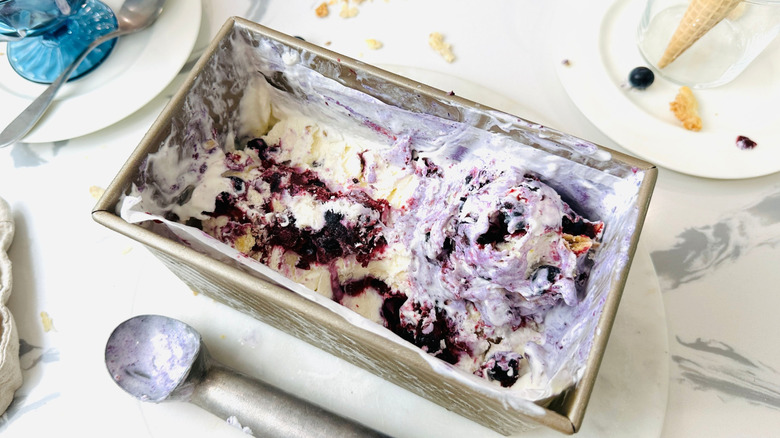
Step 17: Layer the ice cream base into a loaf pan
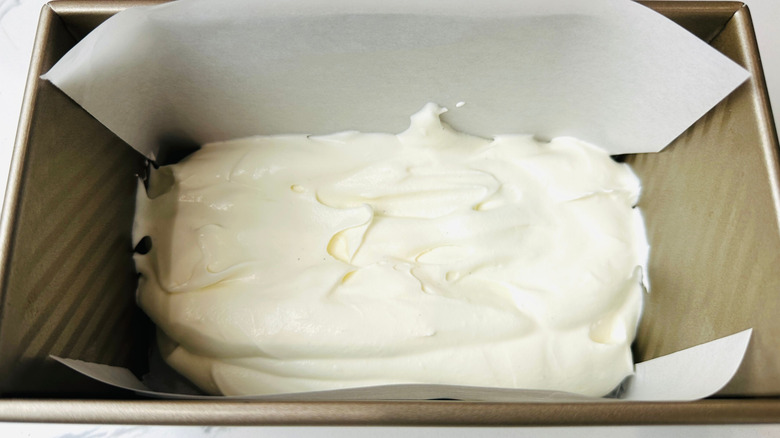
把冰淇淋底分成三分之一份放入長方形模具中。
Step 18: Swirl in some blueberry filling
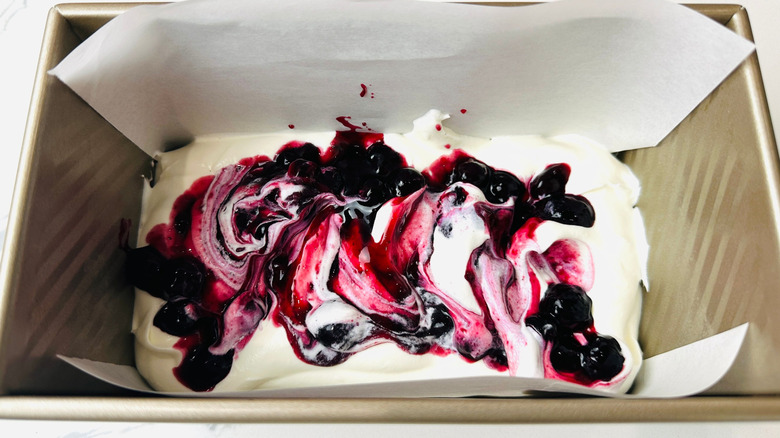
將藍莓餡均勻覆蓋在上方,並輕輕打圈成旋渦狀。
Step 19: Sprinkle on some pie crust
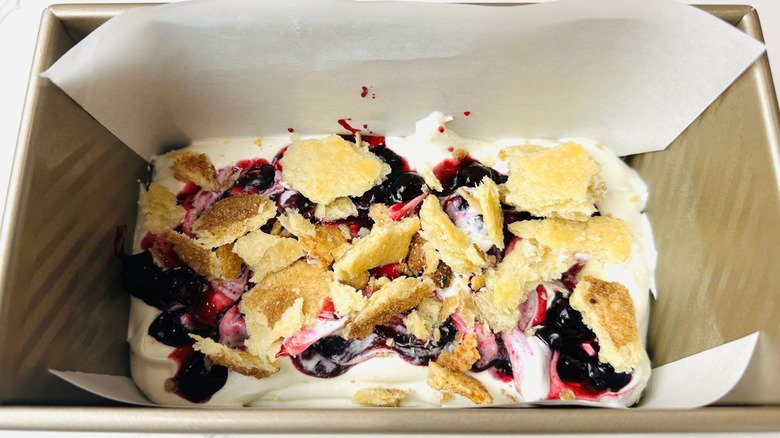
將派皮碎片均勻覆蓋在上方,約覆蓋三分之一的派皮。
Step 20: Repeat the layers
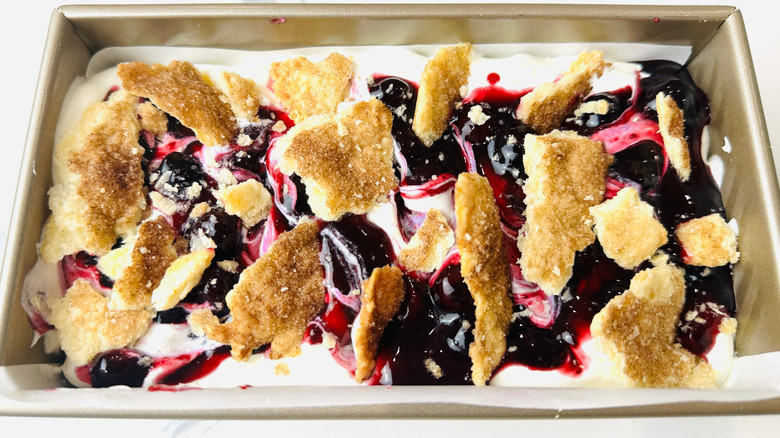
重複上述分層步驟至完成全部材料。
Step 21: Wrap and freeze the ice cream
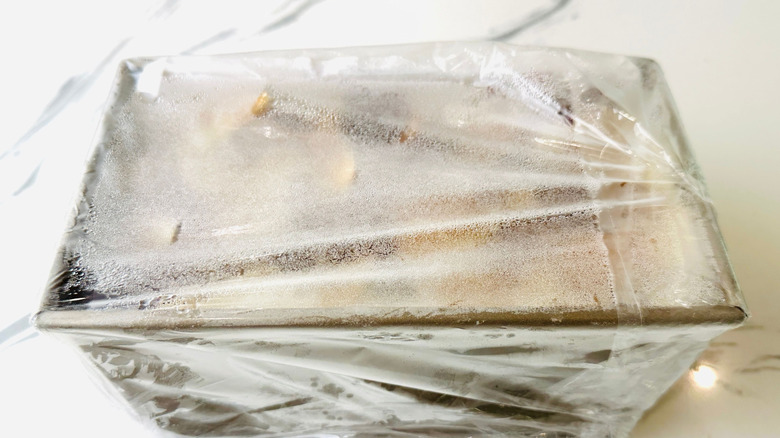
將模具密封包覆,至少冷凍 4 小時或過夜。
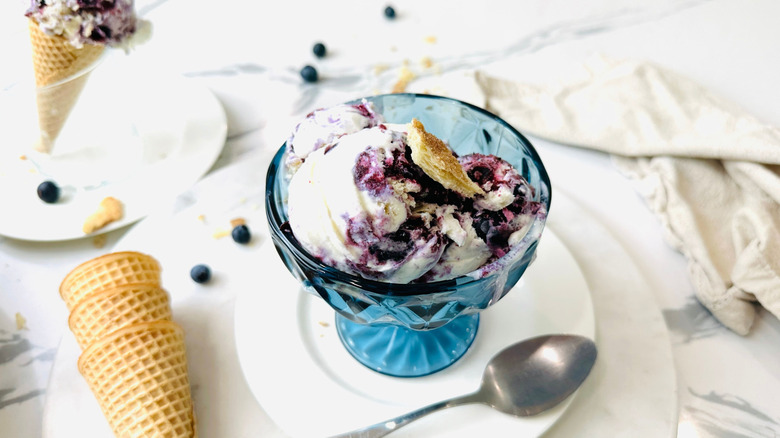
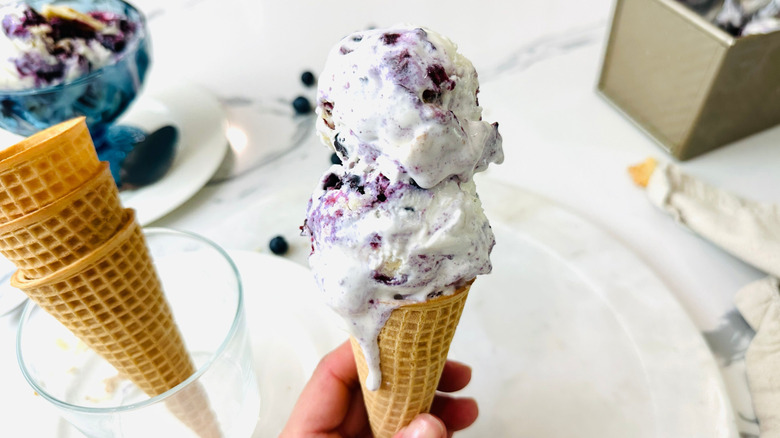
Step 22: Serve the no-churn blueberry pie ice cream
What pairs well with blueberry pie ice cream?
No-Churn Blueberry Pie Ice Cream Recipe
No ice cream maker needed for our creamy and fruity blueberry pie ice cream, which has layers of homemade pie crust studded throughout for a little crunch.
Total time: 4 hours, 47 minutes
- For the pie crust
- ⅔ cup all-purpose flour
- ½ tablespoon granulated sugar
- ¼ teaspoon kosher salt
- ¼ cup cold unsalted butter, cubed
- For the blueberry pie filling
- 2 cups fresh or frozen blueberries
- ¼ cup granulated sugar
- 1 tablespoon cornstarch
- 1 tablespoon lemon juice
- For the ice cream base
- 1 pint heavy cream
- 1 (14-ounce) can sweetened condensed milk
- 2 teaspoons vanilla bean paste or extract
- ½ teaspoon kosher salt
- ½ tablespoon cinnamon sugar, for sprinkling
- Preheat the oven to 350 F.
- To prepare the pie crust, in a stand mixer fitted with a paddle attachment, beat the flour, sugar, salt, and cubed butter until only pea-sized bits of butter are visible.
- Add 2 tablespoons of cold water and mix lightly just until combined but shaggy. Add an additional splash of water as needed.
- Transfer the dough to a sheet of parchment paper and knead lightly to combine.
- Fold the parchment paper to cover the dough and roll it to ⅛ to ¼-inch thickness.
- Sprinkle the dough evenly with cinnamon sugar if desired.
- Transfer the dough to a baking sheet.
- Bake the crust for 16-18 minutes until golden brown and crisp, and then set it aside to cool completely.
- To prepare the blueberry pie filling, in a large saucepan, stir to combine the blueberries, sugar, and cornstarch.
- Add ½ cup water and cook over low heat, stirring often, until the sauce is thickened and the blueberries have released some of their juices.
- Remove from the heat and stir in the lemon juice.
- Set aside or chill until cool.
- To prepare the ice cream base, in the bowl of a stand mixer fitted with a whisk attachment, whip the heavy cream to soft peaks.
- Add the condensed milk, vanilla, and salt, and whip lightly to reach medium-stiff peaks.
- Scrape down the bowl to make sure all of the ingredients are evenly incorporated.
- Break the pie crust into rough shards.
- Portion ⅓ of the ice cream base into a loaf pan.
- Top evenly with ⅓ of the blueberry filling and swirl lightly.
- Top evenly with ⅓ of the pie crust.
- Repeat the layers twice.
- Wrap the pan tightly and freeze at least 4 hours or overnight.
- Serve the ice cream.
| Calories per Serving | 405 |
| Total Fat | 25.5 g |
| Saturated Fat | 16.0 g |
| Trans Fat | 0.6 g |
| Cholesterol | 79.6 mg |
| Total Carbohydrates | 40.4 g |
| Dietary Fiber | 1.0 g |
| Total Sugars | 31.7 g |
| Sodium | 248.5 mg |
| Protein | 5.8 g |
本資訊為 Edamam 根據現有食材及製法的估算值,僅供參考,不能取代專業營養師的建議。

What are tips for making the best no-churn ice cream?
在自製冰淇淋時,確實有幾個容易踩雷的地方,但 Rosenhouse 提供了實用的技巧,能讓你的無攪拌作品達到理想的口感與口味。傳統的攪拌冰淇淋需要不斷攪拌以達到濃郁、完美的奶油質地,但對於這道無攪拌配方而言,重點在於「打發到恰到好處的冰淇淋底料」,從而取得相近的口感。「避免過度打發奶油——太硬就會在最終混合物中變得顆粒感,」Rosenhouse 提醒道。她補充道:「務必將煉乳、鹽和香草完全拌入打發的奶油中,這樣整體風味與口感才會始終如一。」
適當的冷凍也是無攪拌冰淇淋的關鍵之一。「混合物中含有大量脂肪與糖,因此不會像以卡司達(custard)為基礎的冰淇淋那樣快速變硬。」Rosenhouse 解釋說。本食譜建議至少冷凍 4 小時;若追求最佳效果,建議整夜冷凍。
最後,儘管很誘人把藍莓派餡與派皮碎屑直接混入冰淇淋底料中直接混拌,Rosenhouse 強烈建議分層做法。她補充道:「雖然多花一分鐘做分層,但在舀出時呈現的層次感絕對值得。」
How can I change up this no-churn ice cream recipe?
其實有不少方式可以變化這道無攪拌冰淇淋的做法,無論你是想用商店採購的捷徑讓步驟更輕鬆,或是想改變口味。就捷徑而言,Rosenhouse 建議直接使用商店購得的派皮、泡芙酥皮,甚至碎餅乾來取代自家製皮的步驟;餡料方面也同樣適用罐裝藍莓派餡,這樣就能在短時間內完成。於是,最簡單的捷徑就是直接購買一家麵包店或超市的藍莓派,切碎後層層放入冰淇淋基底中。
當然,你並不一定局限於藍莓派的口味。幾乎任何水果派餡都可以和酥皮搭配,無論是其他莓果、核果類,或是帶香料的蘋果。Rosenhouse 也建議加入其他混入物,如碎餅乾、檸檬皮屑或切碎的糖果,以簡單提升風味。你也不需要只用香草做冰淇淋底,只要添加香精或香料,就能在不費太多力的情況下,大幅改變冰淇淋的風味。
